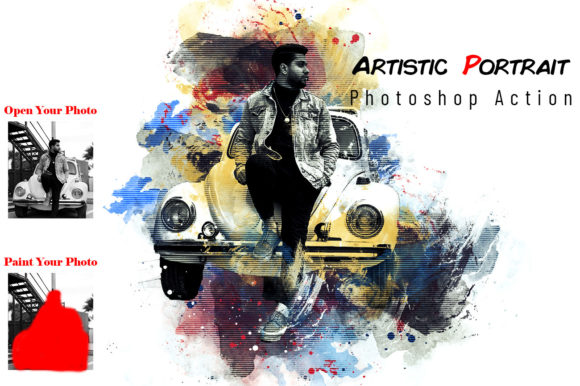
Transforming Ordinary Photos into Masterpieces: A Guide to Artistic Portrait Photoshop Actions
In the rapidly evolving world of digital photography and graphic design, the line between a standard snapshot and a work of art is often defined by post-processing. For photographers and designers alike, the pressure to deliver unique, visually stunning content is higher than ever. This is where specialized tools like an Artistic Portrait Photoshop Action become invaluable. These automated scripts are not merely filters; they are sophisticated workflows designed to enhance images, add depth, and create awesome looks that stand out in a crowded digital landscape.
Whether you are a seasoned professional looking to streamline your workflow or a beginner eager to elevate your creative output, understanding how to utilize these actions can significantly impact your results. This guide explores the purpose, significance, and practical application of artistic portrait actions, helping you build a broader understanding of how automation fits into modern creative processes.
The Significance of Automated Creativity
At its core, an artistic portrait action is a recorded sequence of commands in Adobe Photoshop. Instead of manually adjusting layers, applying brushes, and tweaking settings for every single image, an action performs these tasks instantly. This efficiency is crucial in today’s fast-paced environment, where time is often as valuable as talent.
However, the value extends beyond speed. These actions provide a consistent aesthetic foundation. They ensure that your portfolio maintains a cohesive style, which is essential for branding. By using a tested and reliable action, you eliminate the guesswork involved in complex editing techniques. It allows you to focus on the artistic vision rather than the technical minutiae of layer management.
Compatibility and Technical Requirements
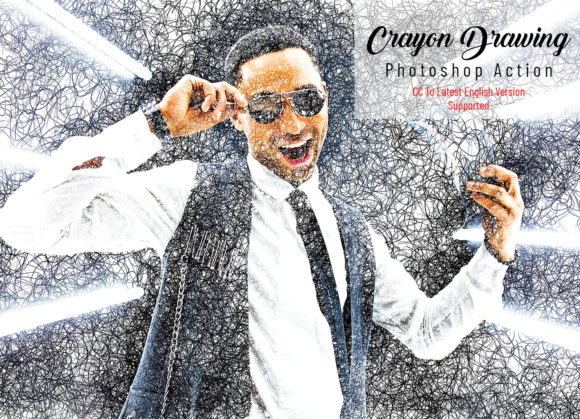
Before diving into the creative process, it is vital to ensure your software environment is ready. Not all actions work universally across every version of Photoshop. The specific Artistic Portrait Photoshop Action discussed here has been rigorously tested to ensure stability and performance. It is fully compatible with the Photoshop CC2020 English Version.
Furthermore, it supports a wide range of earlier versions, ensuring accessibility for users who may not have the latest subscription updates. Supported versions include:
- CS5 and CS5.5
- CS6
- CC, CC2014, CC2015, CC2015.5
- CC2016, CC2017, CC2018, CC2019
- CC2020 (English Version)
Ensuring you are running one of these supported versions is the first step toward a smooth editing experience. Using unsupported software may lead to errors or incomplete effects, undermining the quality of your final output.
Step-by-Step Implementation Guide
To achieve the best results, precision is key. Many users make the mistake of rushing through the setup phase, which can compromise the final image quality. Follow this detailed, logical structure to integrate the action into your workflow seamlessly.
-
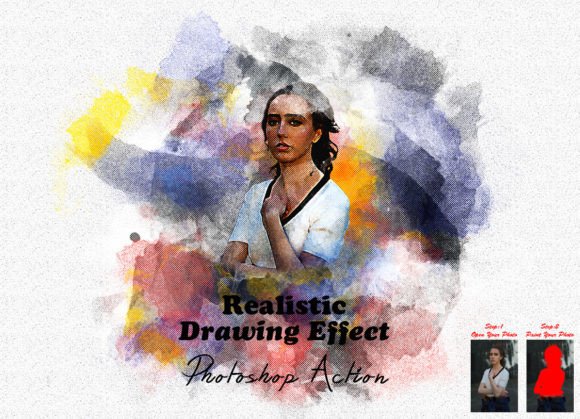
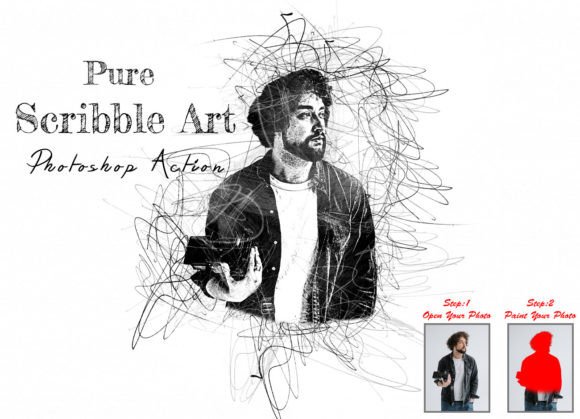
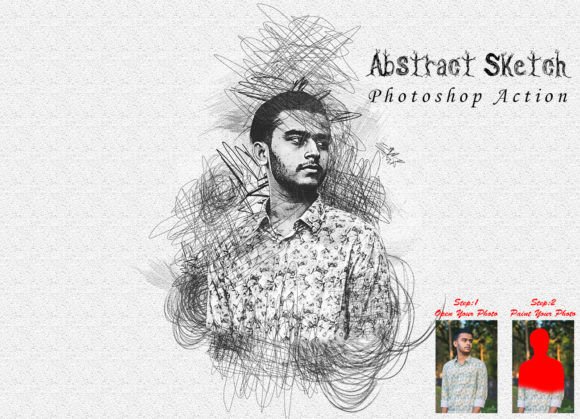
Prepare Your Canvas
The foundation of a great edit is proper preparation. First, open your chosen image in Photoshop. A common oversight is working within the original boundaries of the photo. For the best artistic results, you must expand the space around your photo. This provides "breathing room" for the artistic elements to extend naturally.
Select your background image and choose the Crop Tool from the toolbar. Expand the canvas on all sides. Next, resize the image to optimize resolution and dimensions. With the Crop Tool selected, look at the top menu bar where you will see three blank boxes labeled W (Width), H (Height), and Resolution. Enter the following values:
- W: 3000px
- H: 2000px
- Resolution: 72
Press the Enter button to apply these changes. This standardized size ensures that the action’s effects scale correctly without pixelation or distortion.
-
Create the Paint Layer
This step is critical for the action to function correctly. Open your photo and create a new layer. You must rename this layer "paint" in lowercase letters. The action script looks for this specific name to identify where to apply the artistic effects.
Select a brush tool and begin painting over your image. This does not need to be perfect; it serves as a map for the action to understand where to apply textures and enhancements. Once you have painted the desired areas, close the eye icon next to the "paint" layer to hide it, but keep the layer selected. Then, click the play button on the action panel to run the script.
-
Refine and Finalize
When the action runs, you will eventually see a stop message indicating, "The Action is finish." At this stage, the heavy lifting is done, but your touch is required for perfection. The action provides a base, but you control the details.
To erase unwanted artifacts or soften edges, set your foreground color to 000000 (black). To add more details or highlight specific features, set your foreground color to ffffff (white). Always use soft brushes for these adjustments to maintain a natural, blended look. By toggling between black and white on the mask or adjustment layers created by the action, you gain full control over the intensity and placement of the effect.
Enhancing Images for Modern Audiences
Why go through this process? In modern life, visual communication is dominant. From social media feeds to professional portfolios, images compete for attention in milliseconds. An artistic portrait action helps you meet this demand by transforming standard photos into unique visuals that capture emotion and atmosphere.
Consider a wedding photographer who needs to deliver hundreds of edited photos. Manually creating a painterly effect for each image would take days. Using an action reduces this to minutes, allowing the photographer to focus on client interaction and business growth. Similarly, a graphic designer working on a magazine spread can use these actions to create consistent thematic elements across multiple pages.
Common Misunderstandings
A frequent misconception is that using actions makes the work "cheating" or less authentic. In reality, professional artists have used assistants and tools for centuries. Photoshop actions are simply digital assistants. They handle the repetitive technical tasks, freeing the human creator to make high-level artistic decisions. The skill lies not just in clicking "play," but in knowing when to use the action, how to prepare the image, and how to refine the output to suit the specific subject.
Another assumption is that one size fits all. While the action provides a strong starting point, every image has different lighting, contrast, and color profiles. This is why the refinement step—using black and white brushes—is essential. It allows you to customize the generic effect to fit the unique characteristics of your portrait.
Practical Relevance in Education and Business
Beyond individual creativity, these tools have significant implications for education and business. In educational settings, teaching students how to use actions introduces them to the concept of non-destructive editing and workflow efficiency. It bridges the gap between technical software skills and artistic expression.
For businesses, consistency is brand equity. Marketing teams can use artistic actions to ensure that all promotional materials share a distinct visual language. This coherence builds trust and recognition among consumers. Whether it is for a corporate headshot with a subtle artistic flair or a bold advertising campaign, the ability to quickly generate high-quality, stylized images is a competitive advantage.
Conclusion
The Artistic Portrait Photoshop Action is more than a plugin; it is a gateway to enhanced creativity and efficiency. By understanding the technical requirements, following the precise setup instructions, and embracing the refinement process, you can transform ordinary images into extraordinary works of art. It empowers photographers and designers to push boundaries, save time, and deliver stunning results that resonate with modern audiences. As technology continues to integrate with creativity, mastering these tools will remain a vital skill for anyone serious about visual storytelling.
Remember, the goal is not to replace your artistic eye, but to amplify it. With the right preparation and a willingness to experiment, you can unlock the full potential of your images and create looks that are truly unique and awesome.